

Kissed by Douro Valley sun, bursting with flavour and plumped up with ample juice from winter downpours, our Quinta’s oranges laden so heavily our trees and ask to be picked in late January. What do we do with them all?
Orange compota (or jam)!
All jam served at our B&B breakfasts, for cheese plates at Bistro Terrace and in our Tasting Room at Quinta do Tedo are homemade and will be as long as I am alive. I cannot imagine a better way to enjoy my morning coffee than with Portugal’s toasted rustic bread topped with butter and slathered with our orange jam.
Homemade compota is part of our Quinta’s ethos and ours surpass fellow jam aficionados’ expectations and convert novel jam-dabblers into jam-lovers. The flavour of what we grow at Tedo is superlative, we work hard at it and follow organic practices in our orchards to ensure our products are human-, animal- and Earth-friendly.


I have made jam for years, inspired by my mother’s dedication to transform our very abundant kiwi crop into jam, fruit leather, ice cream, chutney and various other iterations to never waste at our family’s kiwi farm in California in the late 70s. In the early 80s, I lived in Italy with families heavily rooted in agriculture, furthering my growing passion/obsession to find uses for all naturally-ripened and hand-harvest fruit. My mother-in-law, Madame Bouchard, made jams into her early 90s, and my French sisters-in-law are the “reines de confiture”!
Needless to say, I am passionately committed - bien sûr - to make jam from our own Douro Valley fruit. The jam-making process has become a family tradition and a seasonal ritual for me and for my daughter, Odile (although she focuses on figs in summer!)
Here is my recipe for orange compota that is so dear to my heart. The world’s general opinion is that jam is hard to make and too time-intensive, but that is a fallacy. Just follow this recipe and my step-by-step photos for delicious, easy, orange jam, and you’ll quickly become a converted jammer!

Ingredients: oranges, sugar and water.
***Note: I have not included quantities, in part to prove it’s easy and in part to give you the freedom to make as much or as little as you want or have oranges for.***
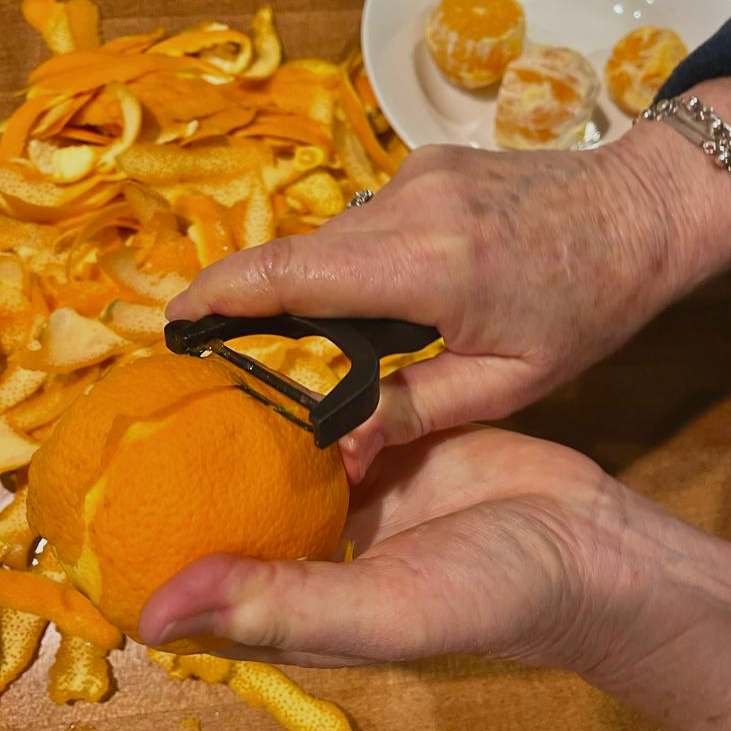
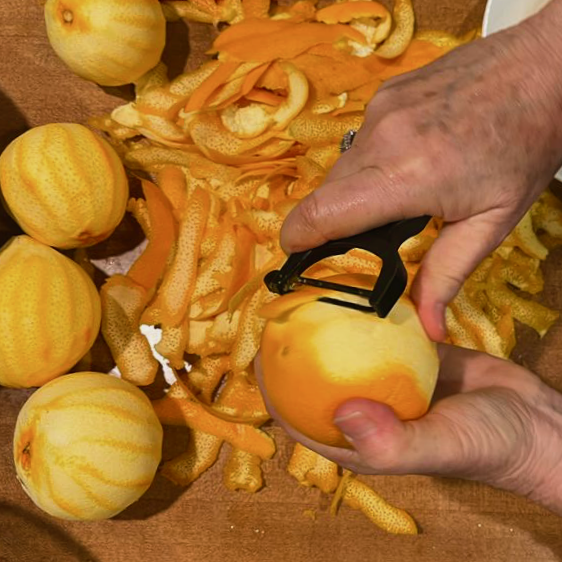
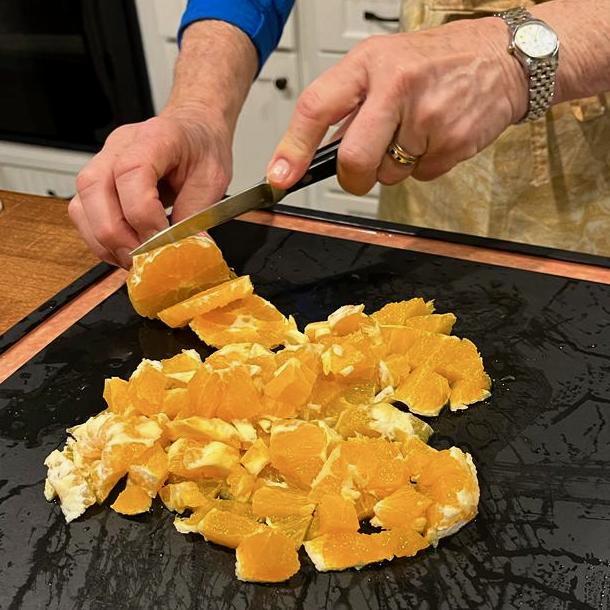
Use a potato peeler to remove the orange skins as thinly as possible, leaving the bitter white part called “pith” on the orange. Set the peels aside.
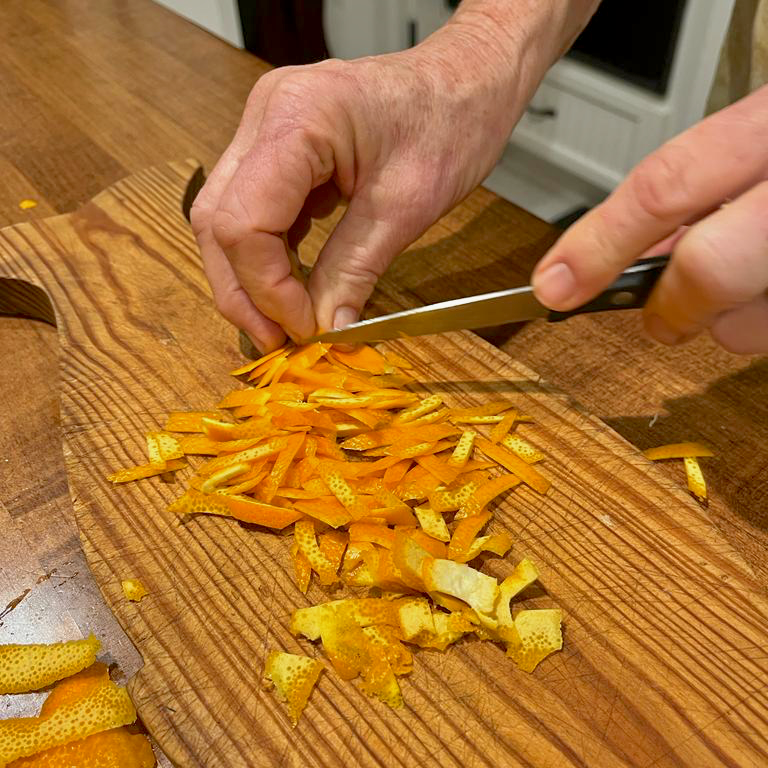
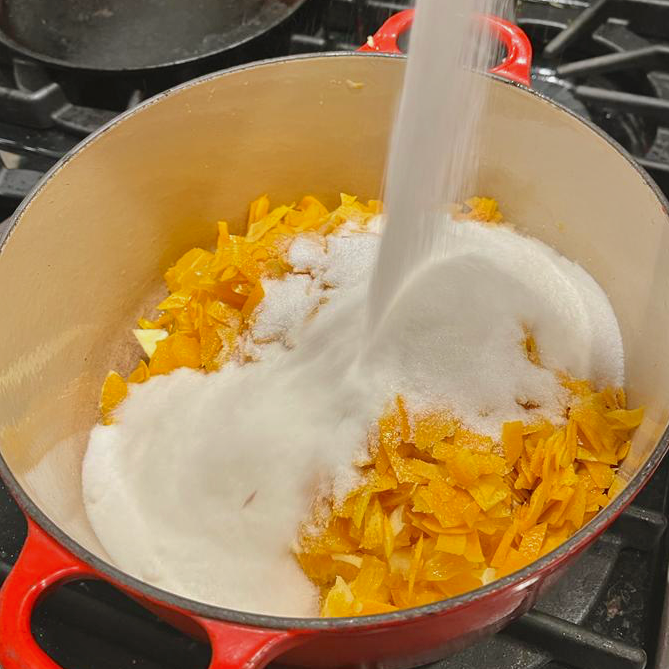
Cut the thin peels into smaller slivers and blanch them in boiling water for 10 min, changing the water 2X. This reduces the bitterness of the peel. Set the blanched, slivered peels aside.
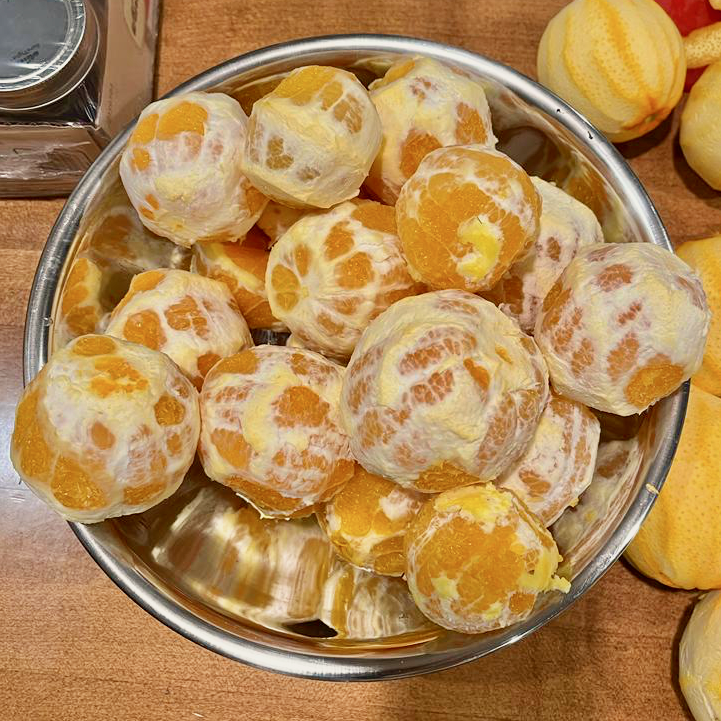
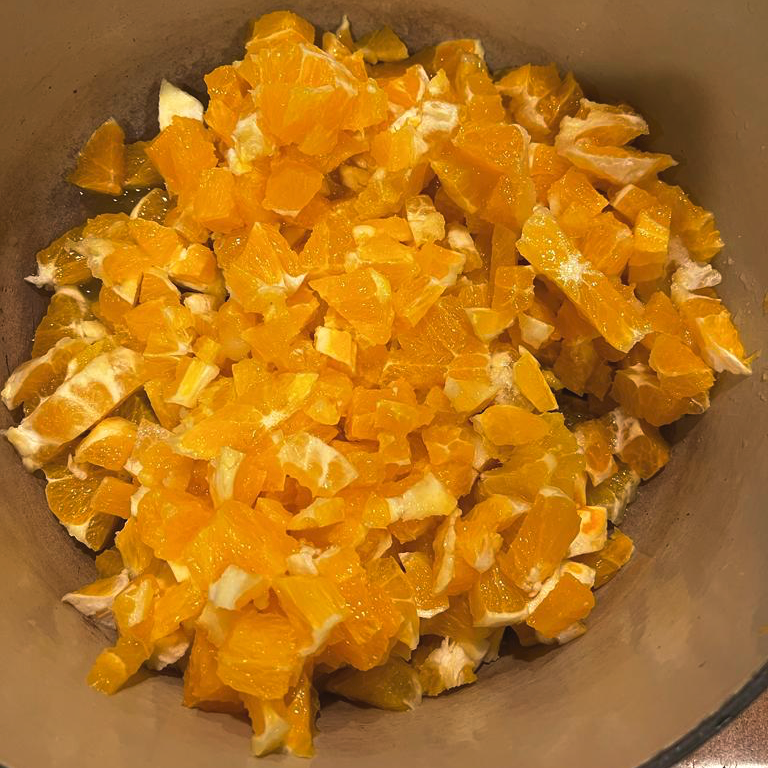
Peel off as much of the white pith as your fingers allow, and then chop the oranges into small pieces.
In a heavy casserole, combine the chopped oranges and blanched, slivered peels with ¾ c sugar to each cup of fruit and peels. Add enough water to almost cover the mixture. ***Note: I like my jam less sweet, but you can always increase the amount of sugar to taste later.***
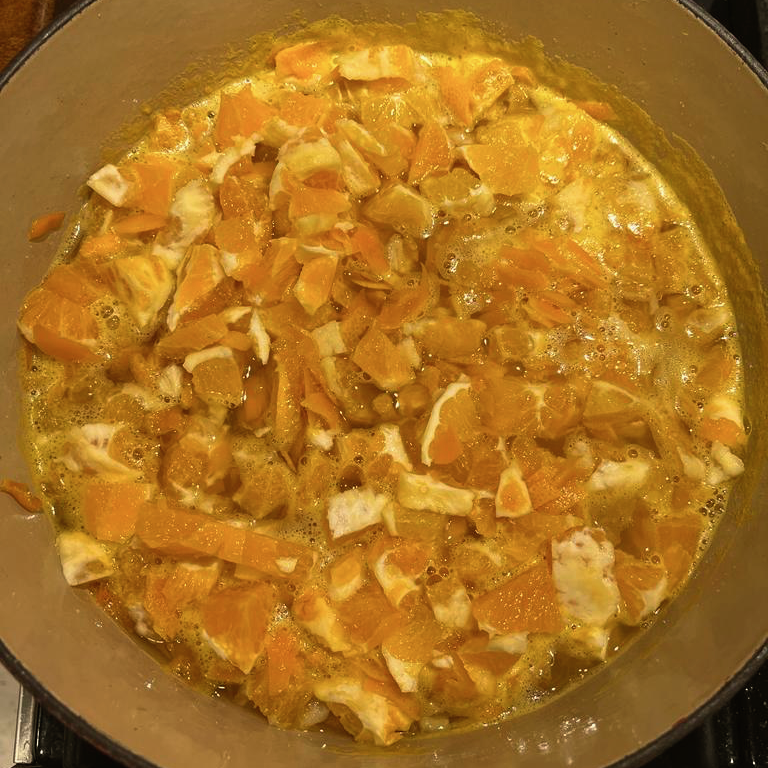
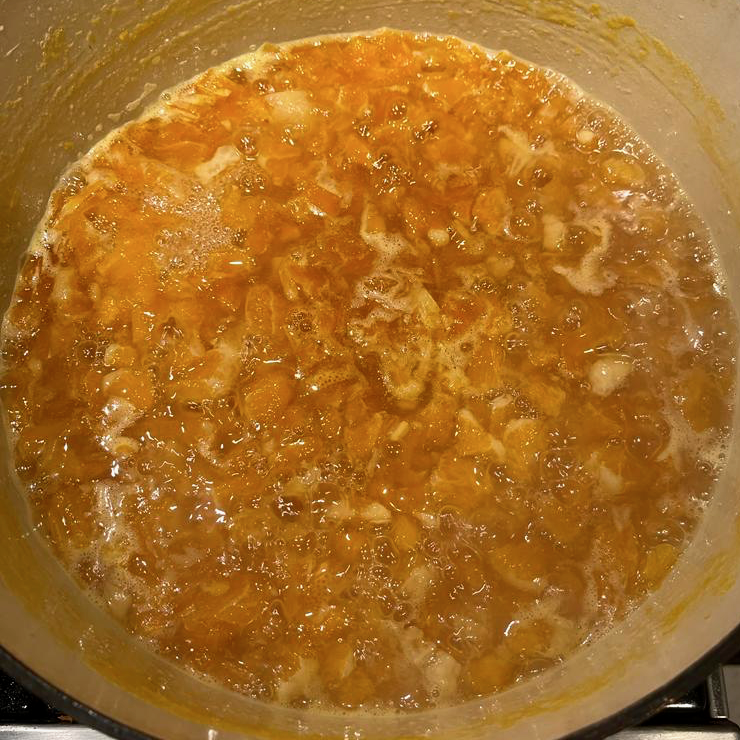
Bring the fruit, peels and sugar to boil and stir occasionally as it boils for about 30 minutes.
At this point I usually let the jam sit for at least 20 minutes and sometimes overnight if I am exhausted.
Taste and adjust with more sugar if needed. If it seems too thick, it probably is! Add more water. The jam will thicken as it cools. ***Note: keep a small bowl in the freezer to test the texture and thickness of a small spoonful of the jam until it reaches your desired thickness.***
Reheat to a boil.
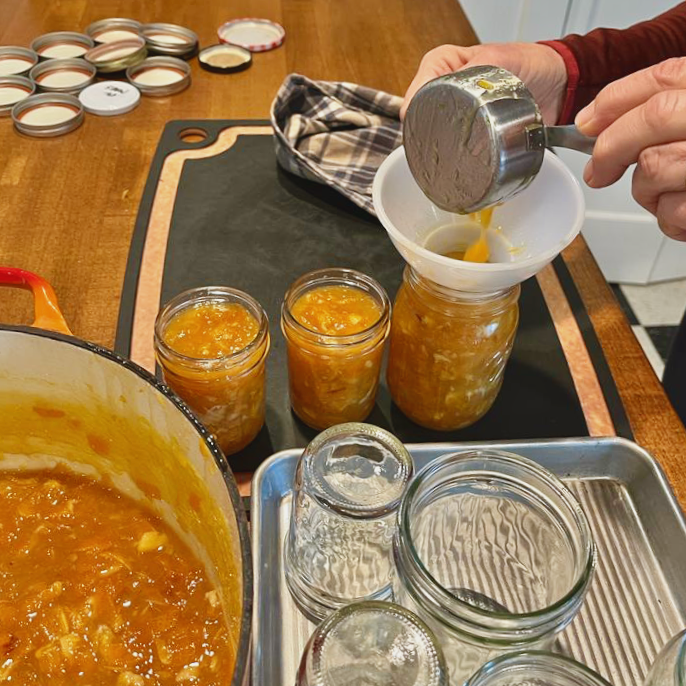
Prepare the jars by heating the glass part without the tops for 10-15 minutes in a preheated 350F/180C oven (I do not like to pour boiling jam into cold jars for fear they might explode - it’s happened before!) until very warm.
This is where it gets a bit messy - I use an oven tray or large cutting board as a surface to pour the jam into the jars over, as there will be hot spillage (but it’s easy to clean!) Take the jars out of the oven with tongs or an oven mitt (they should be piping!) and, with a small measuring cup or whatever you have, ladle the hot jam into the jars.
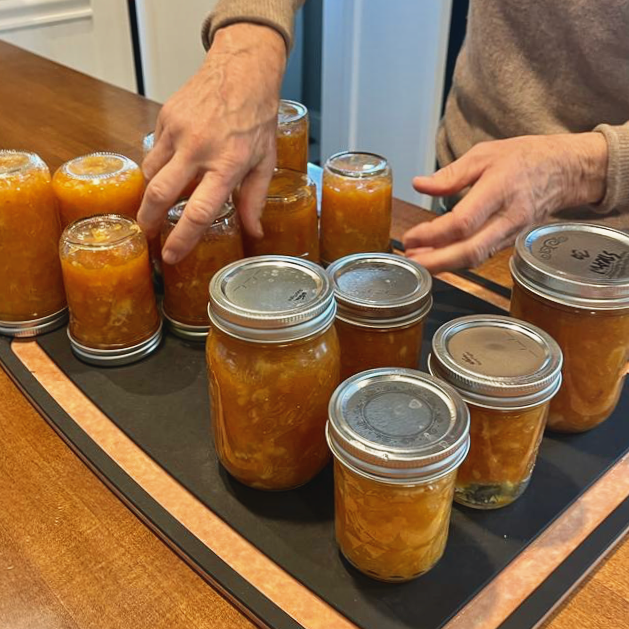
Screw the top on each jar after filling and turn each jar upside down for 5-10 minutes to seal by pressure while the jars cool.
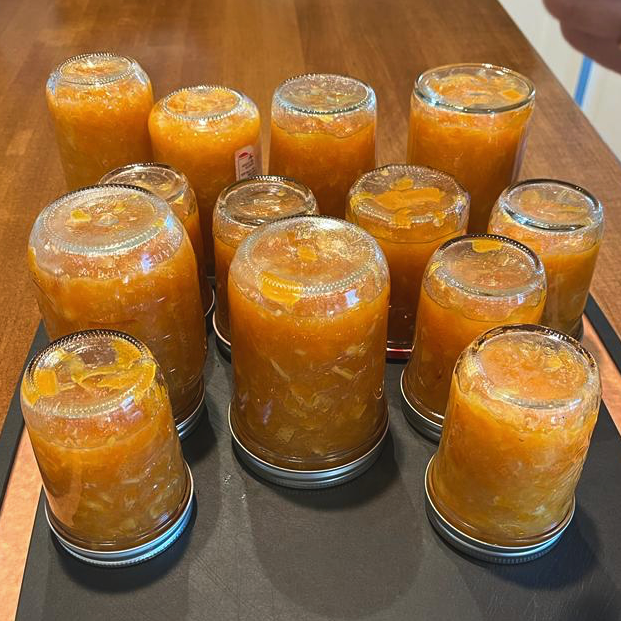
Return the jam jars to an upright position and store them in a cool, dark pantry as you go through them over the days, weeks and months to come.

So there you have it - my recipe for orange compota (which you may have already tasted at our estate or if you selected it amongst our gift options with your order of 11 or more bottles for our annual Holiday Promotion via our online shop).
Now go enjoy and share it!
- Kay Bouchard